
Here we will learn how you can configure the Contact form 7 Goal in Google Analytics with the help of Google Tag Manager.
For this, we need to have the following
- Google Analytics Account,
- Google Tag Manager Account, and
- Website configured with Contact Form 7
Your Google Analytic Tag should be in your google tag manager account.
Now we have to follow the following steps.
Step-1: Configure Contact Form 7 Event Tracking- An Auto Event Listener
It is a contact form seven javascript code known as an auto event listener. This code consists of a DOM event “wpcf7mailsent”. It occurs when a form contact form 7 triggers the successful form submission and sends the mail to the configured email ID. This event listener pushes useful data layers like event name, form id, form objects, and values.
This code is below
<script>
document.addEventListener( 'wpcf7mailsent', function( event ) {
 window.dataLayer.push({
 "event" : "cf7submission",
 "formId" : event.detail.contactFormId,
 "response" : event.detail.inputs
 })
});
</script>
It will create a Data Layer event called cf7submission and return a complete response, an array of every field of the form, and the corresponding value.
Now copy this code and go in your Google Tag Manager account, then in a suitable container, create a Custom HTML tag here and paste the Copied script here. Now choose trigger “All Page” and click on the preview button to debug or test the listener.

Trigger it on the All page

Step-2: Debug or Test the Listener
We always have multiple forms on our site and sometimes in the website footer, so it is better to trigger it on all pages. Now click the preview,

and you will have the tag assistant page, paste the website link, the website debugging starts, and the site will open in a new window. Here you will find the message whether the tag assistant is connected or not.

After a successful connection, you need to go to the page where you have your contact form and fill the form. After filling up the form, you will see the event “cf7submission” on the tag assistant page is like below.


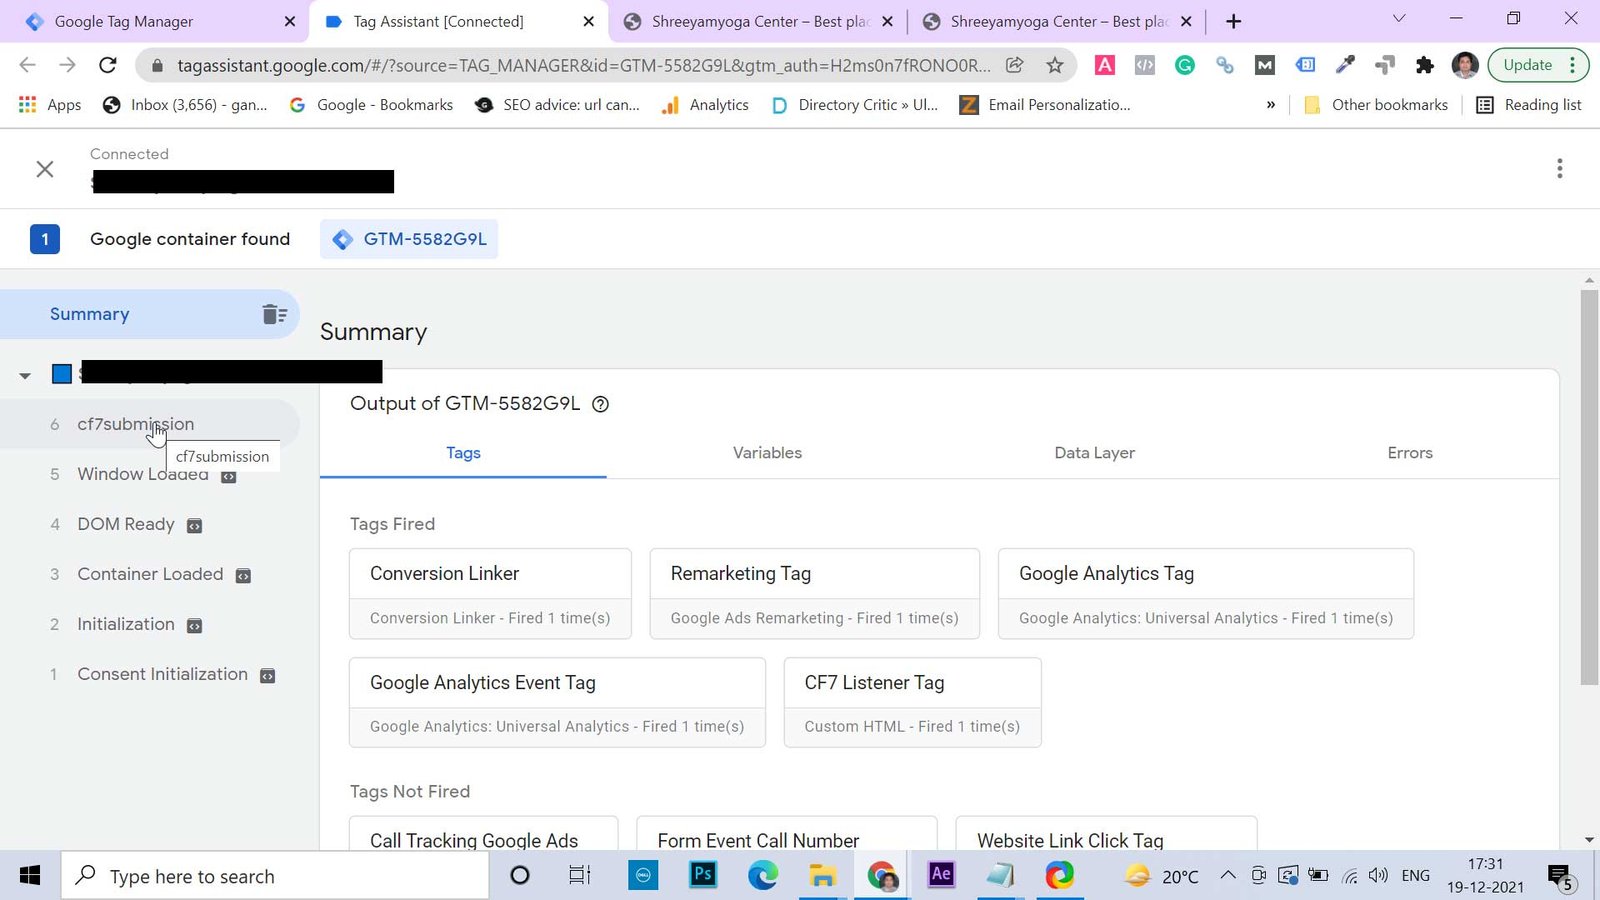
Now go on the Datalayer tab, you will find event, formId, and responses which you fill in the form. All values will display here, but the formId is essential to set up the goal. You can also crate the response object Datalayer which we will learn in a different article, or you can mail me, so I send you the related article of that.

Here you see the formId value, which is “5” and the event name is “cf7submission” which is essential for creating a relevant trigger and variables.
Step-3: Create Variable and Trigger
here first, we will create a trigger, and for it, we will have to go to tag manager and select Triggers in the sidebar menu. Now click on new and name the Trigger. Click on trigger configuration and select “Custom Event” have in event name section add the “cf7submission” it must be same as mentioned above in the script. choose all custom events and save it

Now time for creating a variable
click sidebar variables tab and in User-Defined Variables section click new name the Variable and click on variable configuration and select “Data Layer Variable”. In the ”Data Layer Variable Name” section, type “formId” as mentioned above, don’t mention the value only type the formId and select Data Layer Version which is Version 2 and save it


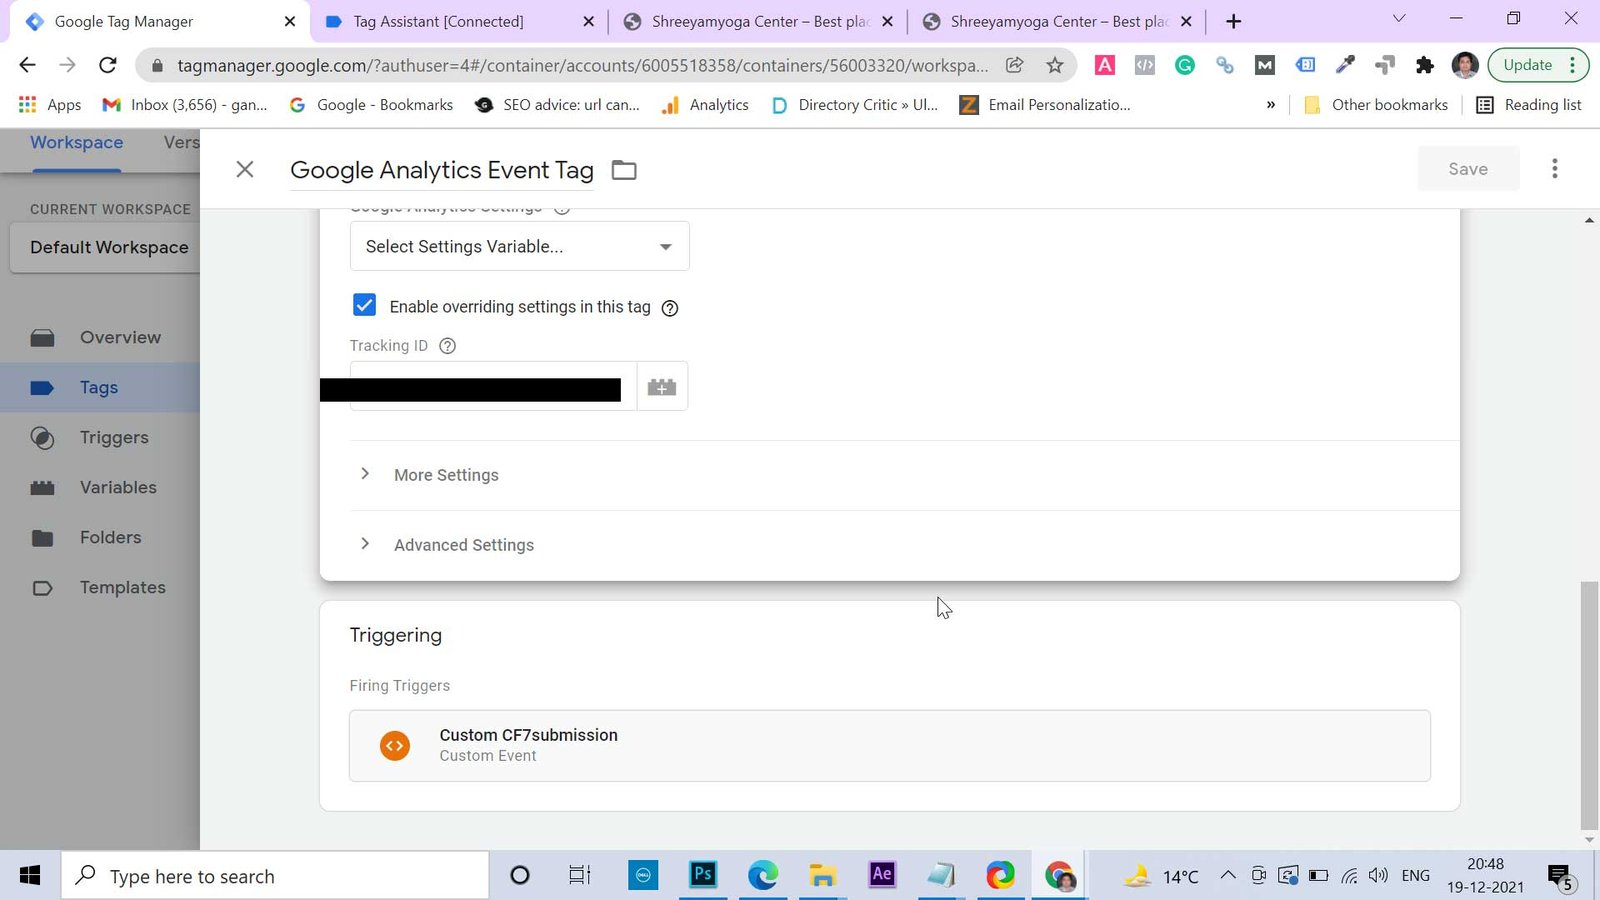
Step-4: Google Analytic Event Tag Configuration
Now time to configure a new tag. Go in the sidebar and click on Tags. Name the tag here, click on Tag Configuration, and select tag type ”Google Analytics: Universal Analytics.” IN track-type select ”Event” Name the Event Category anything I chose ”Form Submission” and in Action Name the Action Name I chose ”Form ID” and choose the Variable which is formId Variable which we recently configured. In Lable, select only the formId Variable, which we have newly created and configured above. Now keep other things intact and select ”Enable settings in this tag” and page the Tracking Id of your Google Analytics.


Note: You will find this Tracking Id in your Google Analytics account admin area. Under the Property section, you will find the ”Tracking Code” option click on it, and above, you will find the Tracking Id there.

Select the Trigger which we have recently created, as mentioned above. Now, if you want to preview or debug to check whether this tag is working or fired after filling up the form or not, you can do it by following the process mentioned above.
Now time to Submit the Tag, Trigger, and Variable we have created. After firing them, now it’s time to create the Goals.
Step-5: Google Analytics Goal Creation
Open your Google Analytics and go in the right property you mentioned above when creating the tag and go in ”Admin” left-hand bottom of the screen. Under ”View” select ”Goals” now click on ”+NEW GOAL” Name the goal i write Form Submission here. in Type select Event and click continue. Now an important part of this configuration comes in Goal details. Please select the category you wrote above at the time of tag configuration. It should be the same name of the category and Action. In Action, my name was Form ID, and Variable was formId the value of the formId was 5, so I mentioned five here.


Leave the label blank, or you can paste the same variable name you selected when you configure the tag. You can copy-paste from there. It is very much required when you capture the response, but you can leave it blank to count the conversion.
The value you can leave blank, and now is the time to save it.
After saving it, now time to check our configuration.
Step-6: Configuration Testing
Now open your website and fill the form, and before it goes in sidebar REPORTS and under it select the Realtime option. Under this, you will see the goal you configured here before filling the form goal value would be zero, but after filling up the form, you will see the value one here
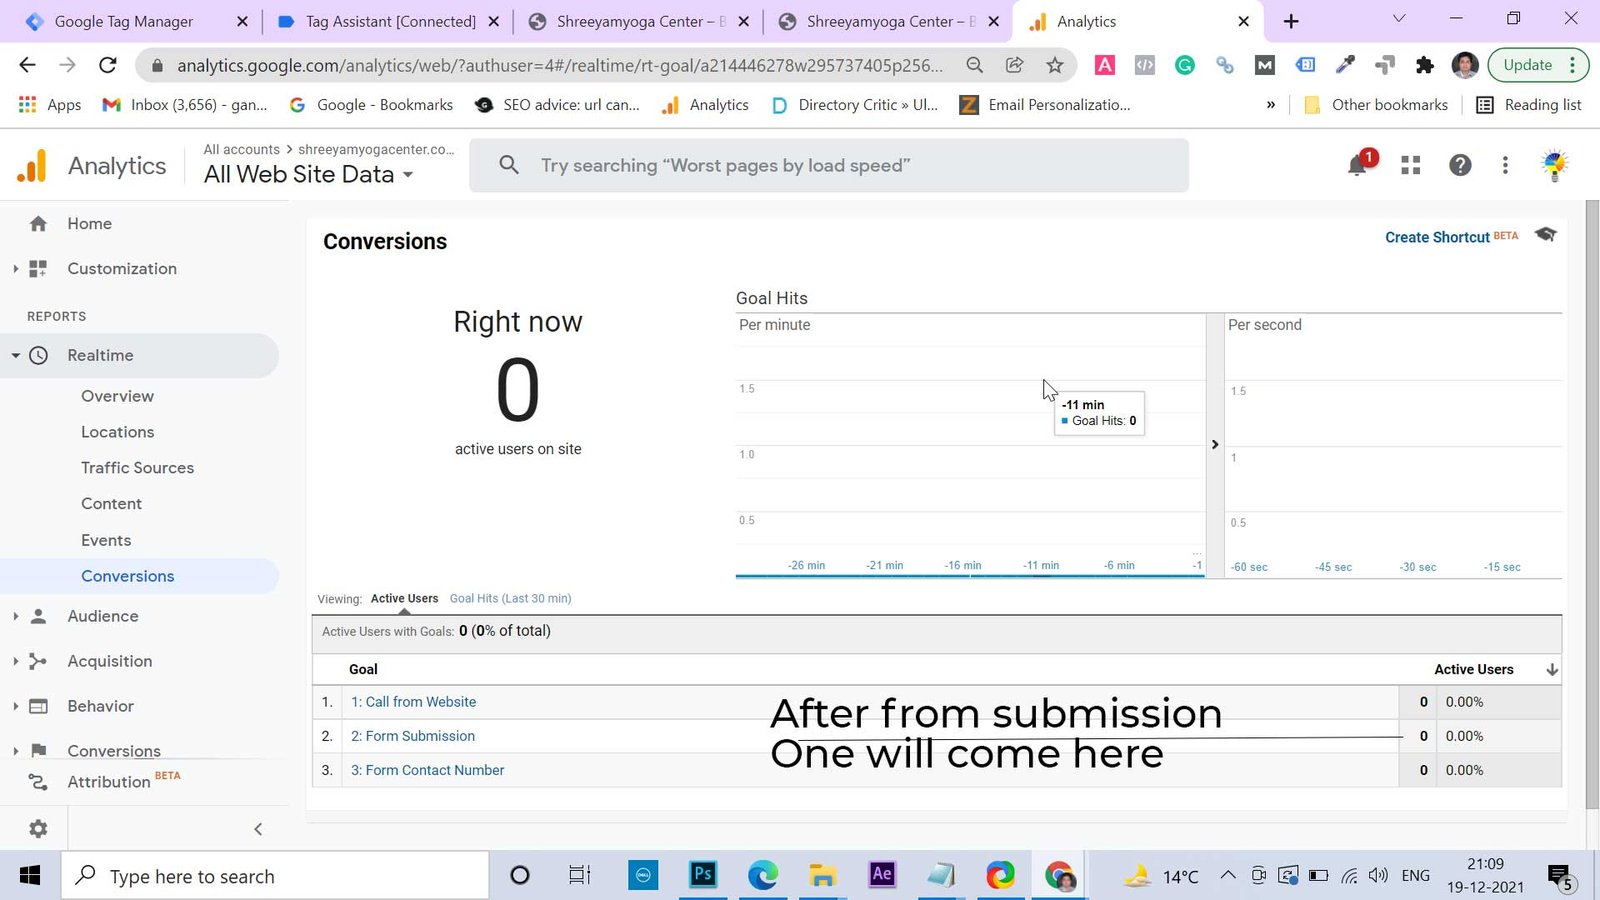
it tells us that our form is working well. but if there is an issue, you need to recheck your configuration what mistake you made.
Still, you face any problem, you can comment here. I will try to answer your query.


Add comment